*Important Note: Information in this blog post is meant to supplement our official instructions, not replace them. Please carefully review the technical installation instructions for DuraDecor Weekend Warrior products to maintain your product warranty.
Aside from being stylish and affordable, peel-and-stick luxury vinyl flooring is easy to install, whether you’re a first-time DIYer or a pro at tackling home renovation projects! Let’s dig into everything that you should know and expect before completing your DIY flooring project using vinyl peel-and-stick planks or tiles.
WHAT ARE THE BENEFITS OF PEEL-AND-STICK VINYL FLOORING?
- Very DIY-friendly
- Low-maintenance and easy to clean
- Can be installed over multiple subfloor types and existing surfaces including concrete, wood, gypsum, tile, ceramic, porcelain, or marble tile—provided that the substrate is dry, without contaminates, and structurally sound. (All grout lines must be filled, smooth, and flush with the surface of the tile to prevent ‘telegraphing’ and adhesion issues.)
- No messy glues are needed, making the installation process simple and much less messy than traditional glue-down vinyl planks. The adhesive is pre-applied to each plank or tile—just peel off the paper backing and stick!
- No power tools are required (but an oscillating multi-tool does come in handy for undercutting door jambs)
THINGS TO CONSIDER:
- While peel-and-stick flooring is water-resistant, it’s important to note it is not waterproof. Any spills on the surface of the floor should be cleaned up as quickly as possible to avoid the possibility of liquid seeping into the seams or being absorbed into the planks or tiles.
- Flooring must be “acclimated” or placed in the installation area for at least 48 hours—and the site conditions should consistently be between 60-80 degrees Fahrenheit (before, during, and after installation). The area should also be fully enclosed and weather tight.
- Flatness of the flooring is important—the recommended flatness tolerance is < 1/8-in. gap (2 x U.S. quarters) underneath a 6-ft. straight level and <1/16-in. gap (1 U.S. quarter) under a 1-ft. level.
- Smoothness is also key to prevent telegraphing
COMMON TERMINOLOGY
Next, let’s look at a few common terms you may see when researching vinyl peel-and-stick flooring. Feel free to refer to these as needed!
Subfloor: A subfloor is the layer above the joists of your house that serves a structural foundation for any underlayment and finished flooring. The joists and subfloor work together to evenly distribute the weight placed on them. Plywood is the most common subfloor, followed closely by OSB (Oriented Strand Board), concrete, and high-performance (engineered) panels.
Substrate: A substrate is the underlying support surface on which the flooring is directly installed. It is possible that your substrate is your subfloor, or it could be an additional layer on top of the subfloor that is suited to proper vinyl flooring installation.
Skim Coat: Skim coating is the process of applying a compound to a substrate/subfloor, creating a smooth surface, reducing any uneven areas, and filling holes or cracks prior to installing your flooring. The compound is sometimes referred to as a “floor patch.”
Floor primer: Flooring primer is applied on the substrate after a skim coat (if a skim coat is needed) and before applying peel-and-stick vinyl planks or tiles. Floor primers have many benefits that we will discuss, but most importantly, it ensures a strong bond. A primer is required for DuraDecor peel-and-stick products.
Telegraphing: Telegraphing refers to visible patterns or bumps on the surface of your new vinyl flooring, caused by an impression of unevenness from the existing flooring or substrate. Telegraphing could happen in a short period or over a longer span of time. If you’re installing LVP over another floor type such as ceramic tile or sheet vinyl, it’s important to ensure that any grout lines or unevenness are smoothed out using a skim coat. It’s also extremely important to ensure that your substrate is completely smooth and clean—free of any debris, holes, staples, etc. as those lumps or bumps can also telegraph to the surface of your new floor.
BEFORE INSTALLATION PREP WORK: REMOVING BASEBOARDS AND UNDERCUTTING DOOR JAMBS
Carefully remove baseboards in the room where your flooring will be installed.
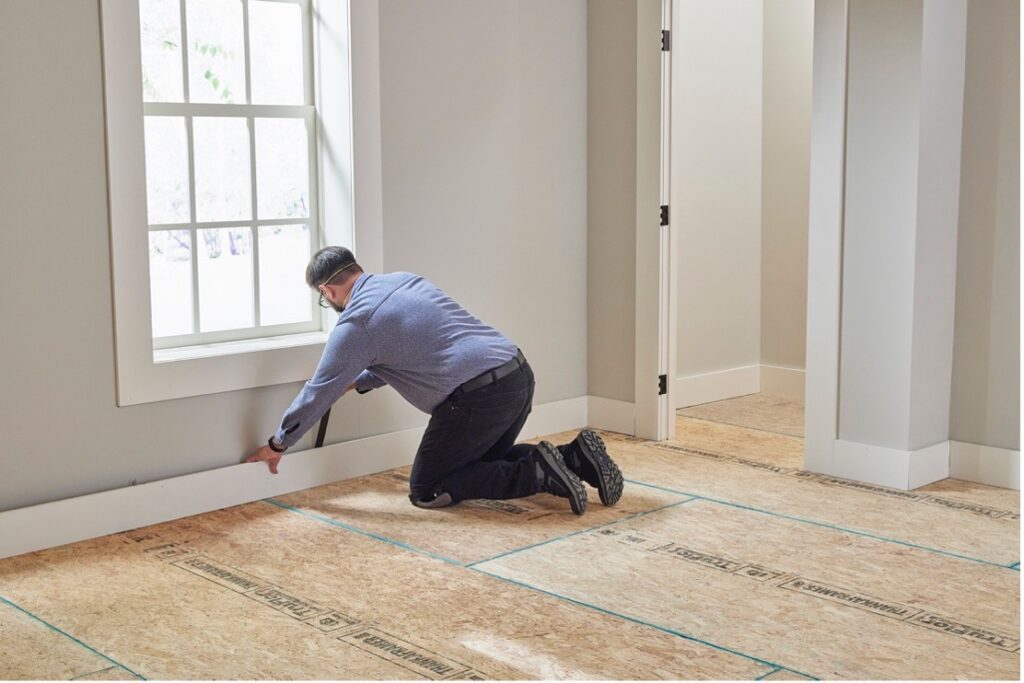
Remove baseboards carefully to prevent damage to the walls or baseboards.
To undercut door jambs, place a piece of the vinyl flooring flat on the subfloor next to the door jamb. This will help you determine the height needed for the undercut. Mark the door jamb at the height of the flooring thickness using a pencil. Extend the mark across the width of the door jamb.
Use an oscillating multi-tool to cut along the door jamb slowly and carefully at the marked line.
Apply gentle pressure, letting the tool do the work. Take your time to ensure a clean and accurate cut.
Once the initial cut is complete, test the fit by placing the flooring material against the door jamb. It should fit snugly underneath, allowing for proper expansion and contraction. If necessary, make minor adjustments by trimming small sections of the door jamb until the fit is satisfactory.
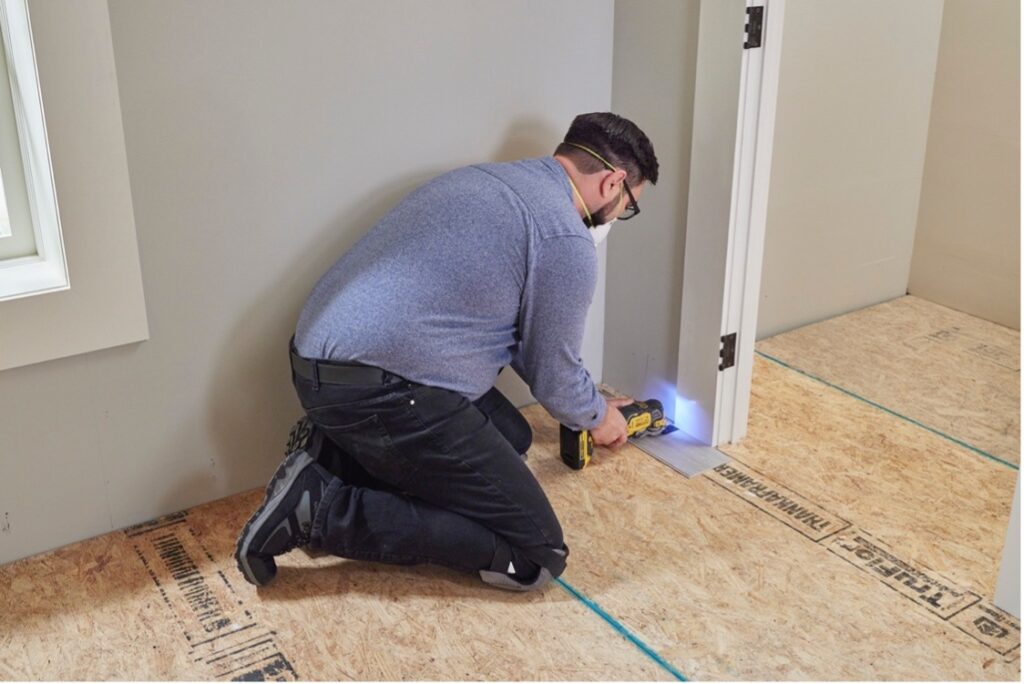
DuraDecor’s technical manager, Andy, uses an oscillating multi-tool to undercut door jambs.
If you have more door jambs in the installation area, repeat the process for each one, ensuring the height is consistent.
Once all the baseboards have been removed and door jambs have been undercut, clean up any wood dust or debris using a vacuum and/or broom.
BEFORE INSTALLATION PREP WORK: SKIM COATING AND FLOOR PRIMER
Believe it or not, preparing your subfloor is the most important step to ensuring your project turns out just the way you envision! Be sure to read our detailed instructions so you don’t miss a step.
Not sure if you can install peel-and-stick vinyl planks over your existing floor or subfloor? No worries! Let’s take a look.
Here is a list of unsuitable substrates for the installation of luxury vinyl peel and stick flooring:
- Hardwood—The coating/staining in hardwood can telegraph to the surface of peel-and-stick flooring and discolor the material.
- Any floating or loose floor coverings, VAT, carpet, cushion vinyl, rubber, cork, foam, asphalt tile, or any substrate with visible mold, mildew, or fungi
- Any substrate in wet areas, such as inside showers or saunas
- Any substrate that has been coated with a varnish or oil-based enamel, paint, primer-sealer, or stain-blocker
- Substrates made of Masonite™, chipboard, wafer board, fiberboard, particleboard, construction-grade plywood, CDX, OSB (including AdvanTech™), Lauan, cement board, or any non-underlayment grade panels must be removed and replaced or covered with an underlayment grade plywood. (Pressure-treated or fire-retardant plywood should not be used.)
- RVs, campers, or boats due to unstable temperatures and moisture levels
Preparing the Substrate
Your substrate should be clean, dry, smooth, and flat. Keep in mind that dust and debris can cause adhesion issues with peel-and-stick planks or tiles.
With an existing floor, the floor should be cleaned well (sweep, vacuum with a HEPA filter, light damp mop and dry) to remove any potential contaminates—skipping this step could result in adhesion failure.
Skim coating
If you are installing over an existing floor with any type of pattern or embossed surface, (linoleum, sheet vinyl, ceramic tile, etc.) skim coating, or using a “floor patch,” is required to completely level and smooth the surface. If this important step is skipped, then it’s possible for the pattern from the original floor to “telegraph” through the luxury vinyl peel and stick flooring.
Good rule of thumb: Run your hands across the existing floor and take note of any ridges, lumps, or bumps. If you can feel it, you will eventually see it.
Priming the Substrate
There are many benefits to using flooring primer, including improved adhesion for peel-and-stick flooring, enhanced durability, and substrate stabilization. Primer creates a uniform surface and reduces the risk of uneven or inadequate adhesion.
A latex-based flooring primer is required for the installation of DuraDecor’s Weekend Warrior collection. We recommend Henry Self-Stick Tile Primer, available at most home improvement retailers. (TIP: Be sure to follow the manufacturer’s instructions on the back of the bottle.)
You should never use a multi-purpose primer or a paint primer for a peel-and-stick flooring project. While they may all be called “primers,” they don’t all work the same way or have the same purpose.
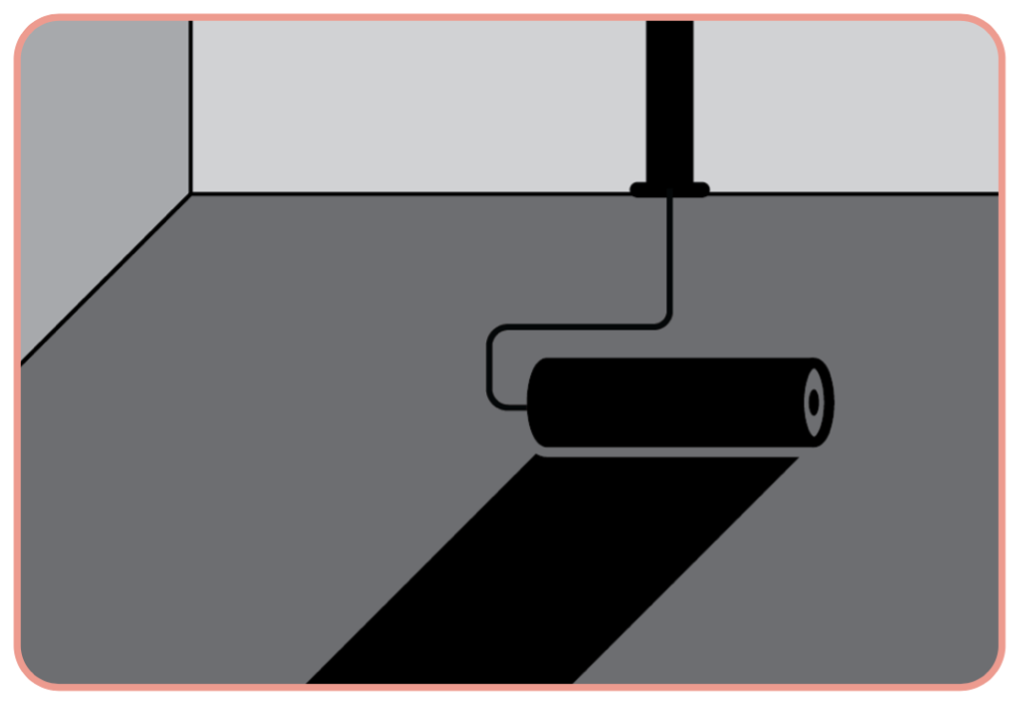
Use a latex-based flooring primer prior to installing peel-and-stick LVP.
INSTALLING DURADECOR’S PEEL-AND-STICK PLANKS
Once the prep-work is done and your new DuraDecor flooring has been acclimated, you’re ready to install peel-and-stick LVP (luxury vinyl planks)!
Determine the ideal installation pattern and direction. Measure the area, then mark your starting line in the center of the room with a pencil or chalk line (don’t use pen or permanent marker). This line should be straight, and the layout should be balanced, with equal-sized planks on the first and last rows. You can lay planks out (without peeling off the backing paper) to visualize how your flooring will look once it has been installed. You will want to mix planks from different boxes to ensure a professional, random appearance.
If your last row will be less than half the width of a single plank, move your starting line over by half the width of the plank.
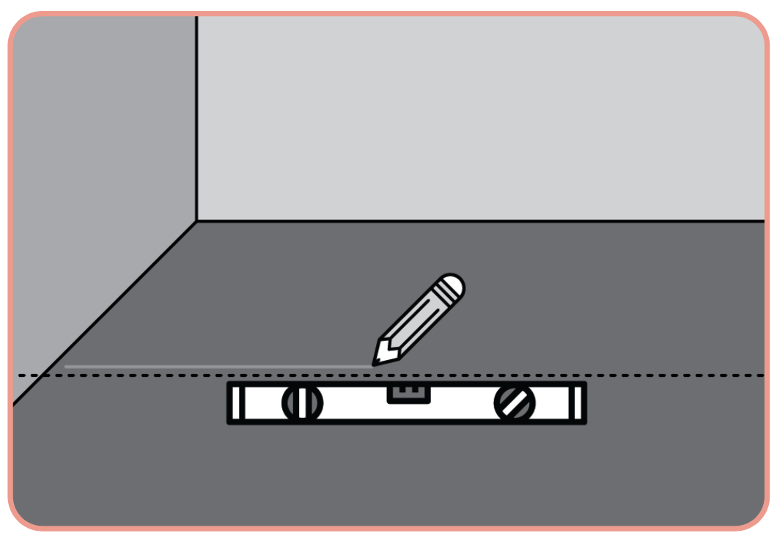
Mark your starting line using a level and pencil or chalk line. Be sure the line is straight.
Once you’re ready to place your first plank along the starting line, remove the release paper from the back and press down firmly. Continue to press each plank along your starting line. The joints of the pieces should fit snugly together.
To cut a plank for an end piece, measure and mark with a pencil. Use a speed square and sharp utility knife to ‘score’ the surface of your plank. Then snap downwards to complete the cut. Peel off the backing paper and press down. You can use the remainder of the cut piece to start your next row.
As you complete a row or area, use a three-section roller to roll lengthwise and widthwise over the installed planks. DuraDecor’s pre-applied adhesive is pressure sensitive and is “activated” by this rolling motion.
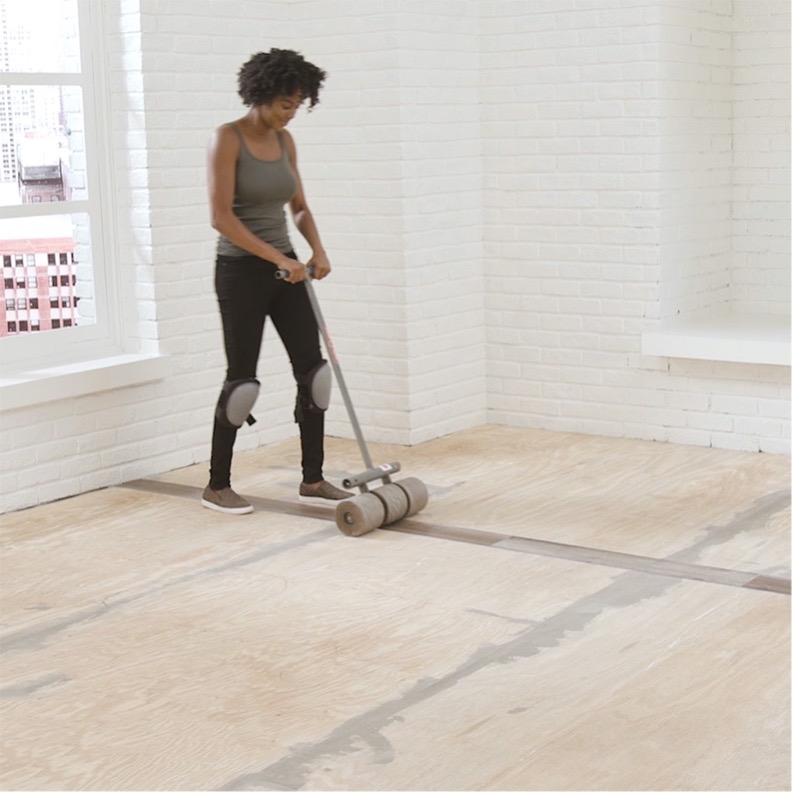
Use a three-section roller to roll lengthwise and widthwise over the installed planks.
Repeat each step until all rows have been installed. Be sure to leave a 1/32” expansion gap around the perimeter of the room to allow for expansion and contraction of the vinyl flooring during temperature fluctuations.
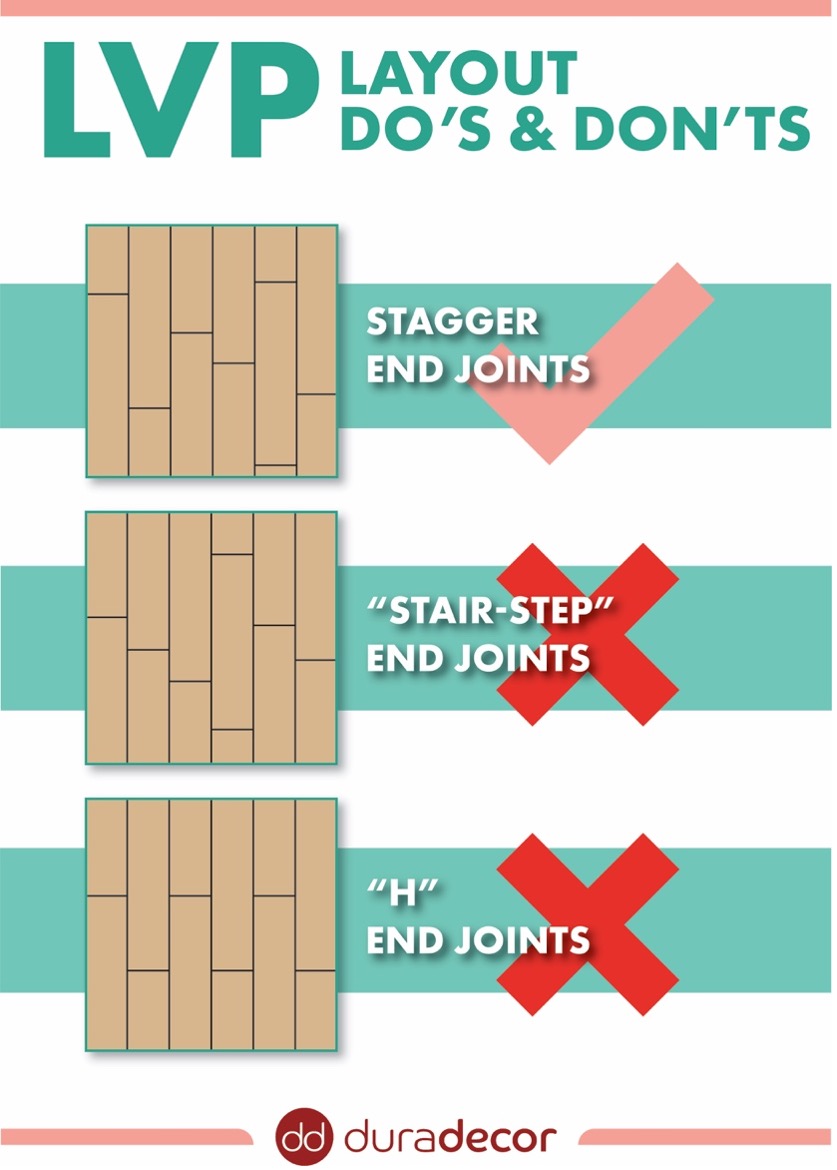
PRO TIP: It is recommended that plank end joints be staggered randomly by at least 8-inches to avoid an undesirable “stair stepped” or “H joint” pattern.
FREQUENTLY ASKED QUESTIONS
Can I use an additional adhesive to install DuraDecor peel and stick planks?
No, it is not recommended. Other adhesives can interfere with the chemical makeup of the DuraDecor adhesive, which can result in emulsification of the material, gapping, doming, etc. Applying an additional adhesive will also void the warranty of your DuraDecor flooring.
What is an expansion gap and why is it necessary?
An expansion gap is a deliberate space left around the perimeter of a room between the wall and newly installed flooring. This gap allows for natural expansion and contraction of the flooring material due to changes in temperature and humidity. If there is no space for this movement, it can lead to buckling, warping, or other forms of damage. This gap is typically concealed by baseboards or molding after installation. The expansion gap for DuraDecor’s Weekend Warrior collection of vinyl peel-and-stick planks is 1/32-inch.